heads up: the videos don't work currently, I'll look into that soon. You can find them by scrolling through my Mastodon timeline
The idea of making a tamagotchi-like thing has been floating around for a while now, especially in the context of the (Dutch) hacker event badges. After seeing how incredibly cute the pwnagotchi twitter, I wanted to get started on making something myself.
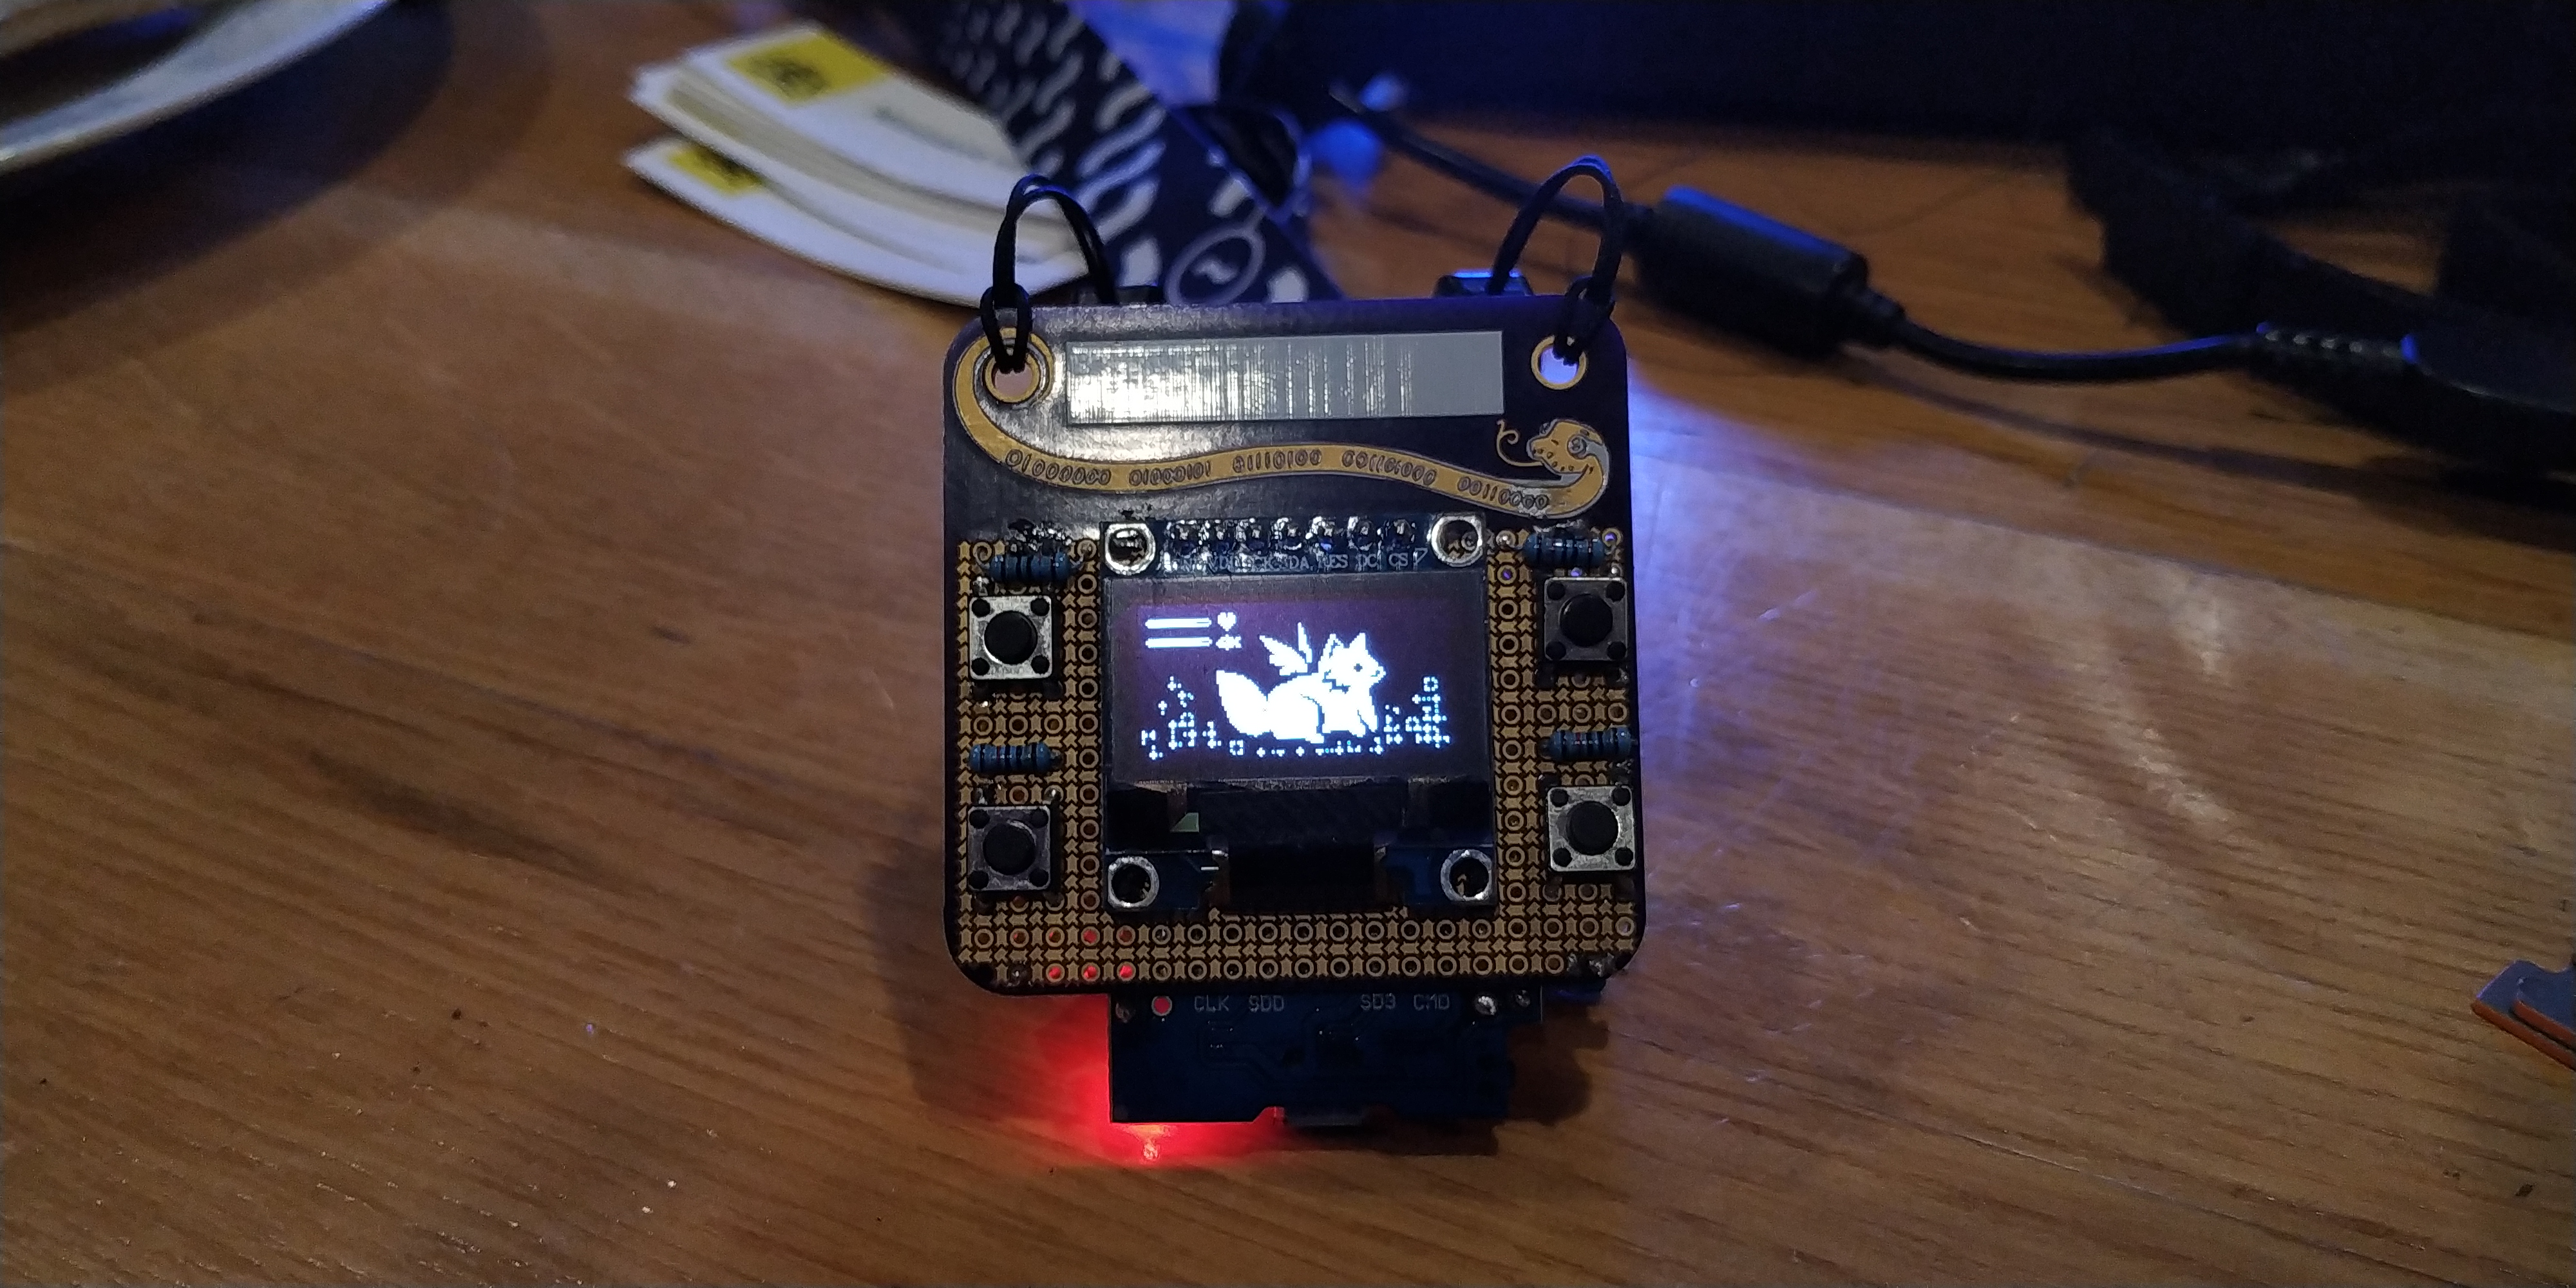
With eth0:2019 Autumn coming up, it was a perfect time to get started. Every visitor was going to receive a DIY badge, a 5x5cm purple protoboard based on this smd-optimized design, with a field to write your name, and mascot art by Nekolett (twitter). I got my hands on one early, around 2 weeks before the event, and realizing it fit an SSD1306 OLED and 4 buttons nicely, I got started on the tamafoxi.
For software, it was going to use the badge.team platform, used on various badges. BasOort (twitter) already soldered an ESP32 straight on the protoboard, but that's a bit too hardcore for my soldering skills :P
The ESP32 edition of the D1 Mini was a perfect module to get started with.
As I've wanted to get started with pcb designing for a while now, I planned on getting a quick prototype done, and then getting my first pcb design done, produced and shipped, all in the 2 weeks before eth0.
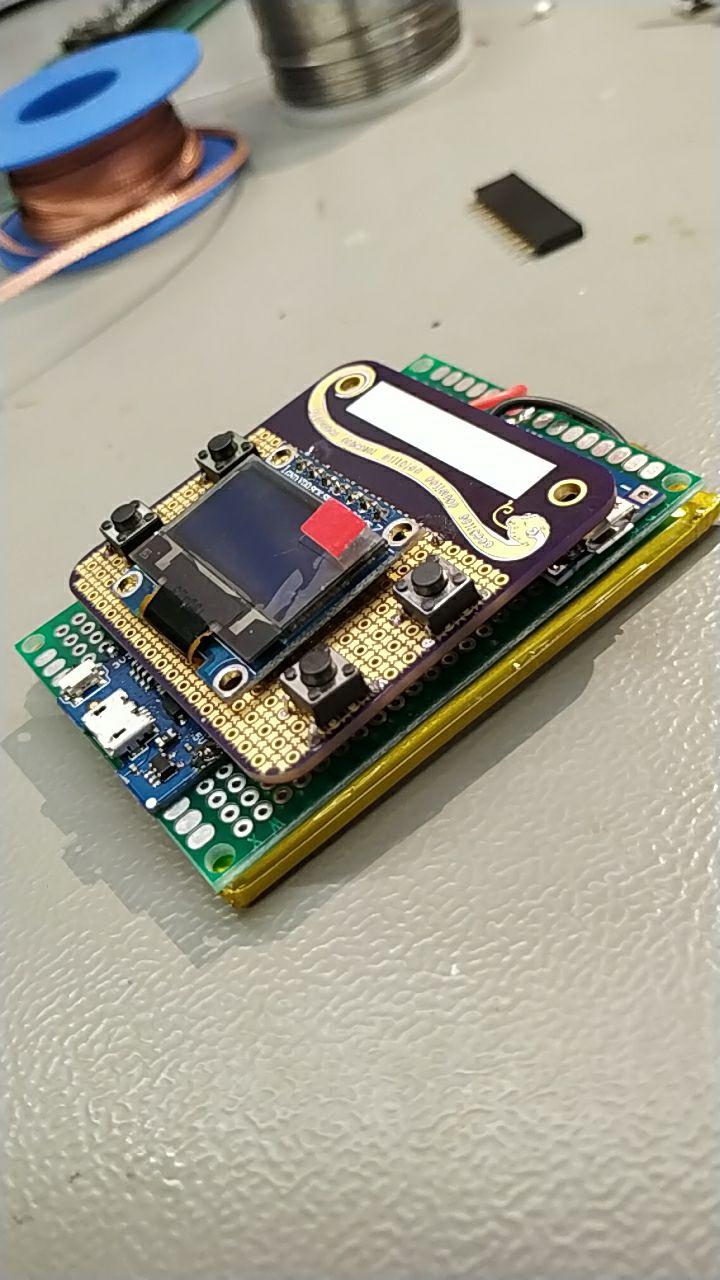
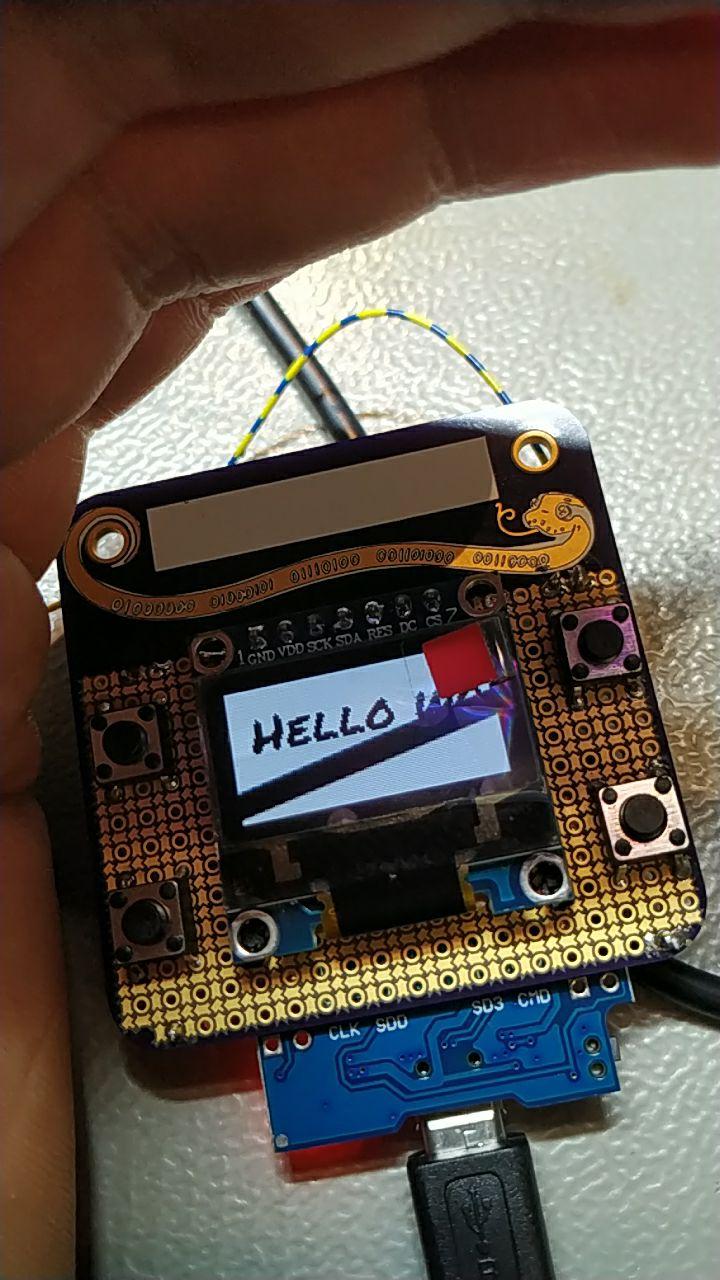
I got the 4 buttons and the screen in place, taking extra care not to accidentally bridge the wrong pins to the ground plane. This design might be perfect for SMD prototyping, but it was certainly challenging to use for through-hole.
The screen and buttons fitted nicely, and soldering went better than expected. I still had a full-size extra green protoboard to fit extra stuff, and a big 2500mah battery I scrapped from one of those promotional creditcard-sized powerbanks.
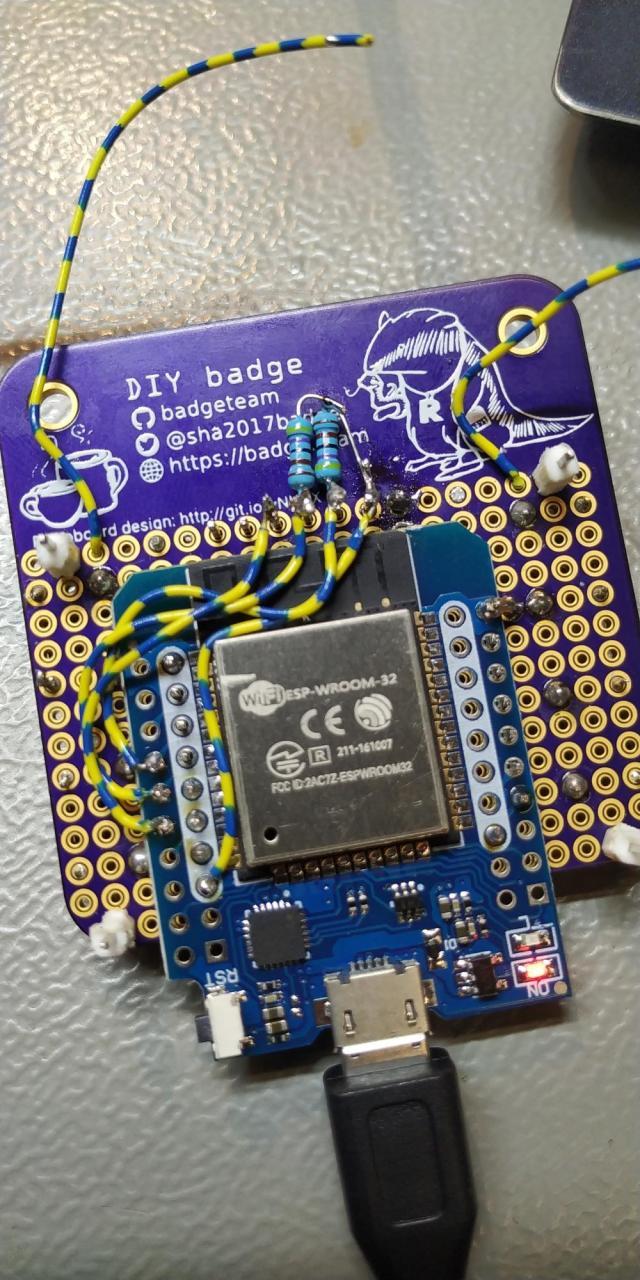
I ordered some ESP32 D1 mini's, but never expected for them to arrive in time, but luckily I could borrow one from a hackerspace participant. With that hooked up to the screen, and some electronics advice from the badge.team Telegram group, I got my OLED set up with external pull-up resistors, displaying text from the badge.team firmware.
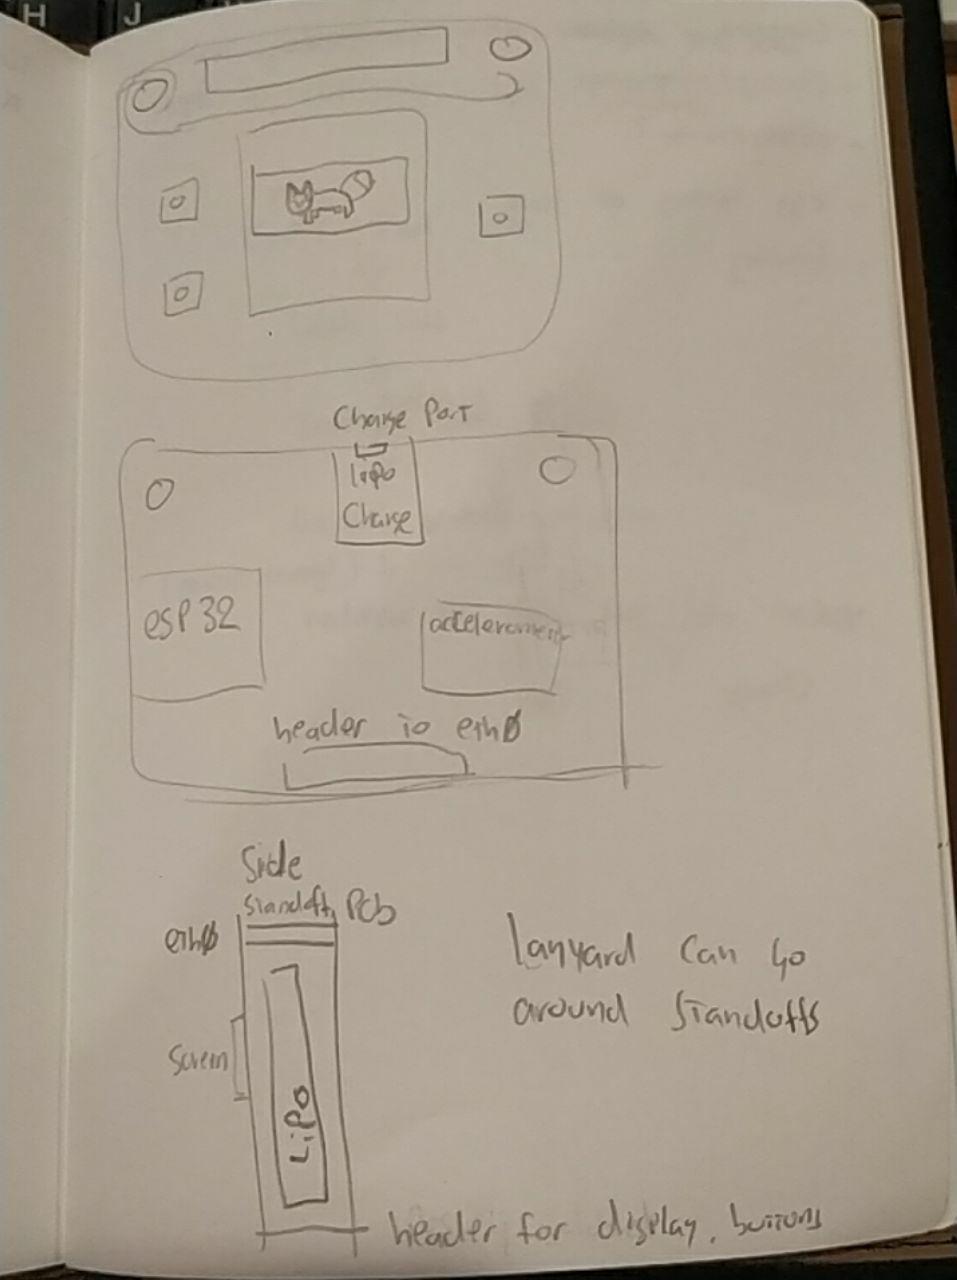
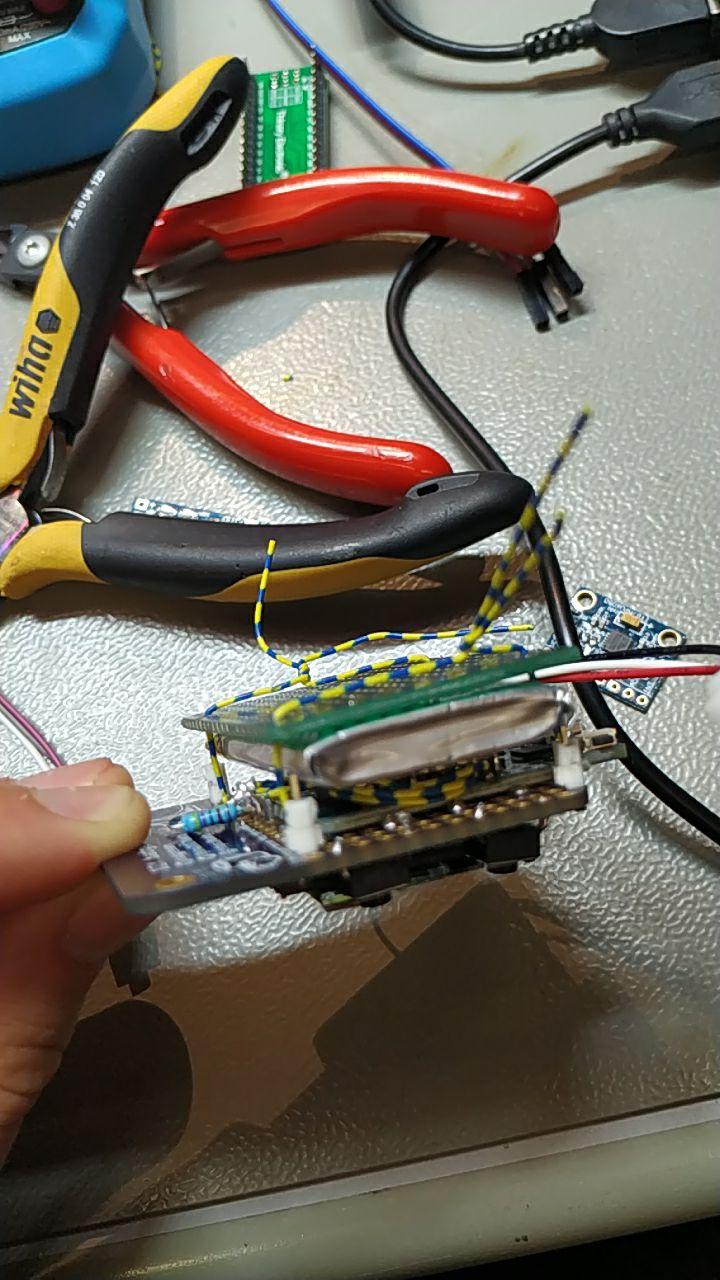
I then got my battery assembly in place, by sandwiching the battery between the eth0-badge, and cut-to-size green protoboard, tied with some wire.
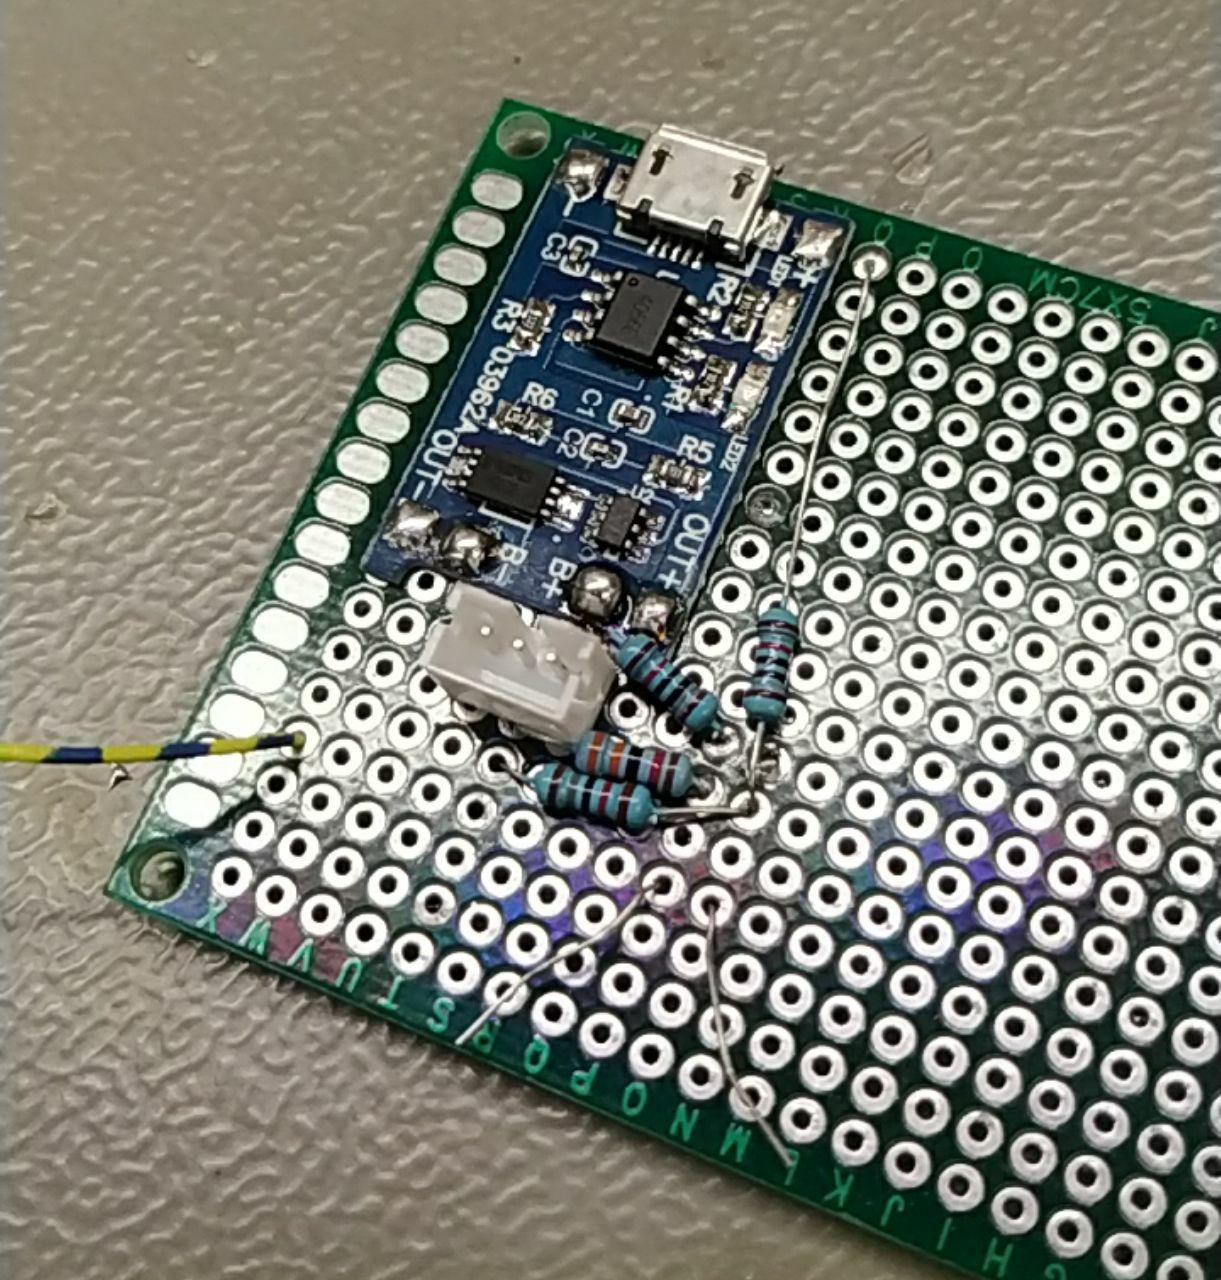
With some advice on voltage-dividers, running a bunch of calculations, I got a test board working with the lipo charging module, and test pads for scaled-down battery and charging voltage.
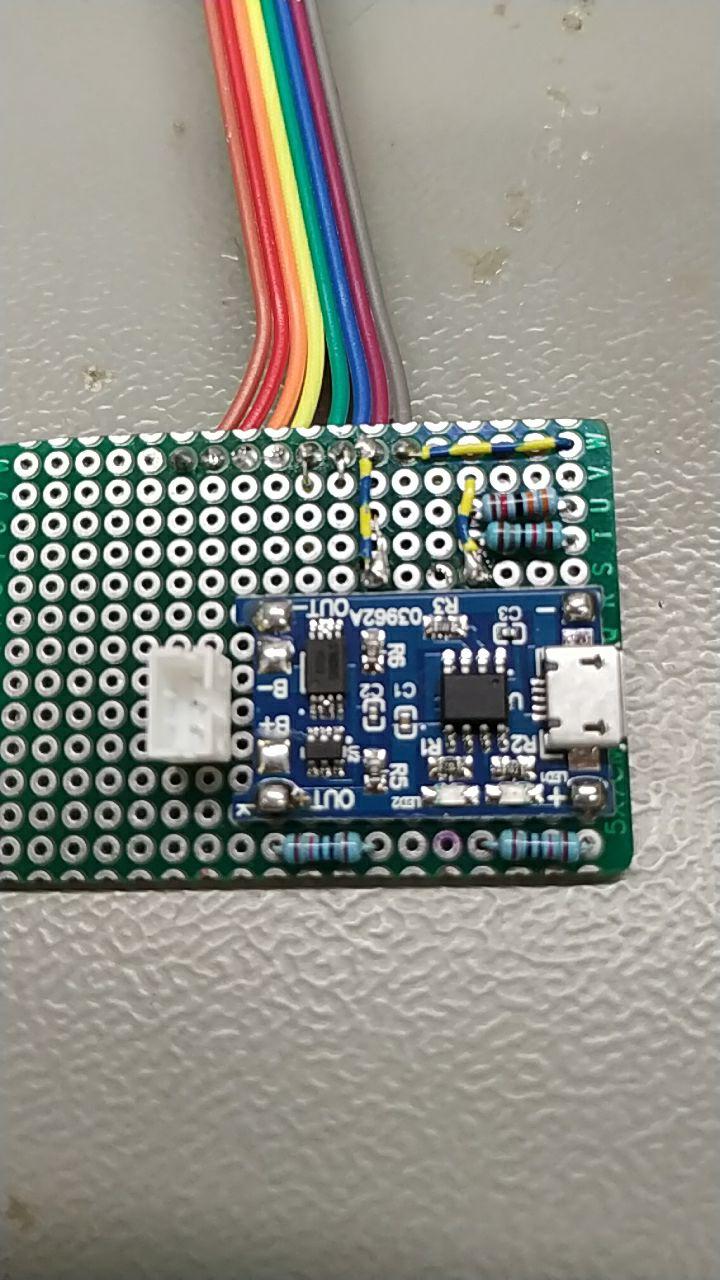
After receiving complaints about the mess off resistors, I laid everything out nicer on the smaller protoboard
This would also fit the MPU6050 accelerometer, connected to the same I2C bus as the screen.
Now that the hardware worked, it was time for some software
With the first animated sprites designed by Neko, I then found out it wasn't possible to just put PNG files in the right folder and use them directly. Because the micropython base is compiled to bytecode, I was told to just read the PNG as a bytestring, and include that in the firmware. This worked well, and the tamafoxi was alive!
Worried about the filesize of including lots of PNG sprites as strings, I got started on some (premature) optimization. A separate Python script would convert the images to a 'better' format, and decode them on the badge. I also wanted to deduplicate as much of the information as possible. Adding a visualization step with PILLOW, you can see what it does:
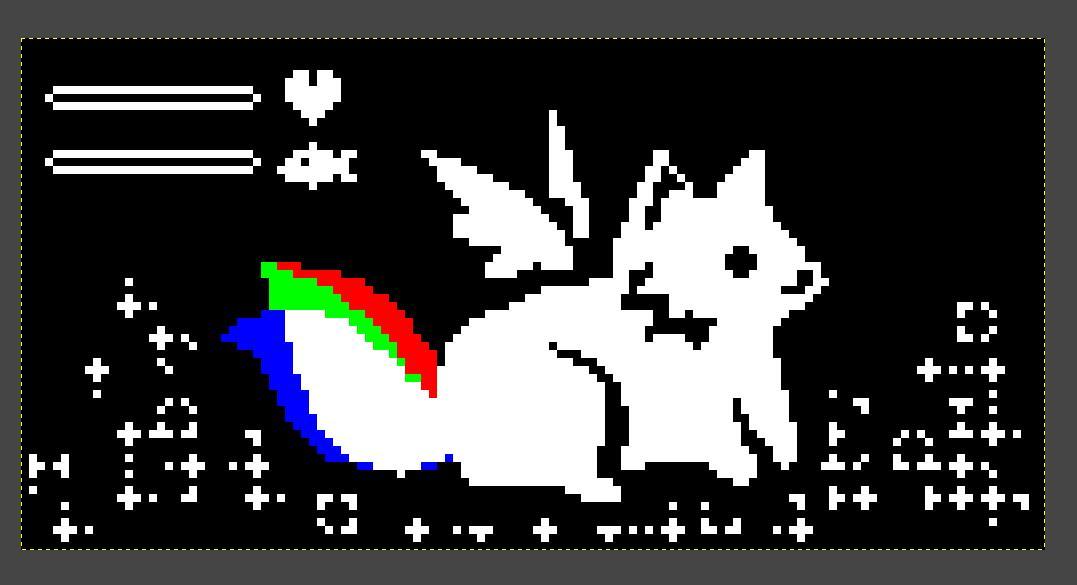
Everything white would be included as a base layer, with the red, green and blue sections as the difference per frame, to be overlayed upon the shared base-image.
To cut down on storage even more, I implemented one of the simplest lossless compression algorithms: Run-Length Encoding. This made everything a lot smaller, at 5550 characters vs 20234 characters of bytestrings.

It didn't really work yet though, so I put the RLE-encoding on hold, and continued developing with PNGs. Animations were finished for the basic lifecycle: starting as an egg ('tama' means egg), turning into a fox. If you don't care for it well enough, it'll turn into a plant waving in the wind.
More tinkering on the image storage ensued, trimming the animation frames to the minimal rectangle that changed, instead of storing full frames for them. There was still something not quite working correctly, with frames missing part of the shape.
A beautiful 12-frame hatching animation was added, with persistence in the badge's NVS, so it'd only hatch once, and be a fox after any further reboots.
A basic hunger system was added, and feeding the fox by pressing 'A' would display a CHOMP text, in absence of animation.
I got the basics nicely done, right before eth0, but lots more work was about to be done during the weekend. WiFi support, which could then sync with NTP to know how long the badge was off, to catch up on hunger-updating, making it real world time dependant instead of adding to a counter only when the badge was on.
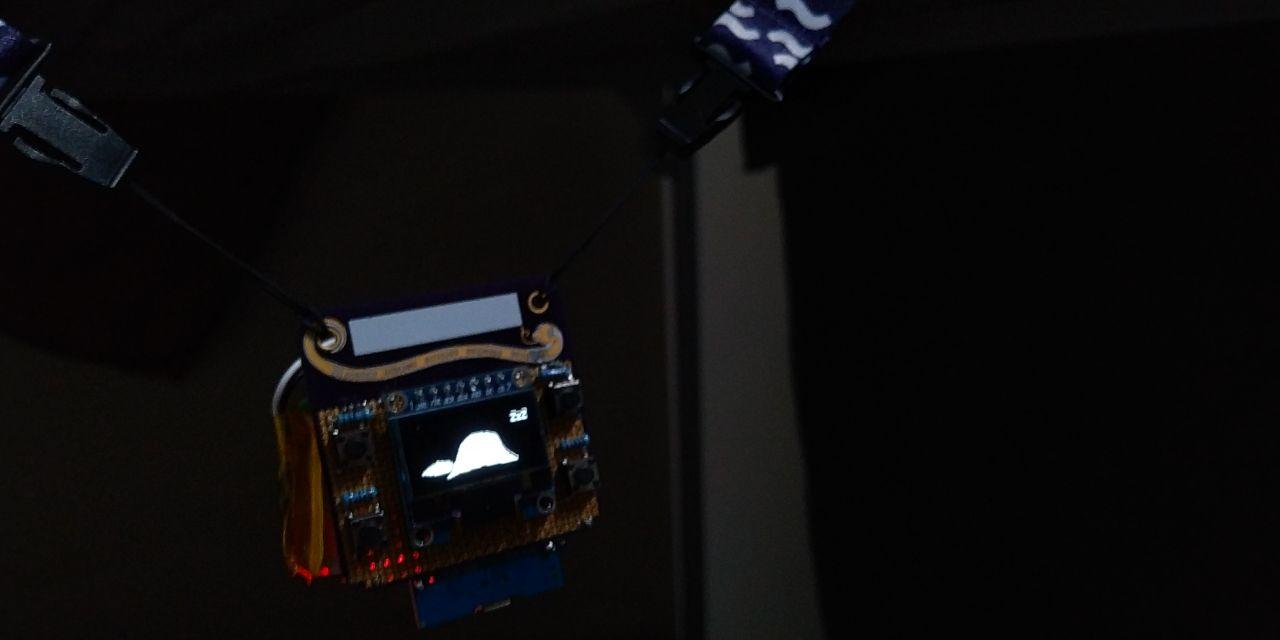
Getting sleepy on the first night of eth0, I wanted to have a sleeping mode done, but couldn't get it working in time because I was so tired. As a hack, I just opened the serial console, killed the main loop, and displayed the first frame of the sleeping animation. With the tamafoxi hanging from the side of the bunkbed, I went to sleep.
On day 2, after lots of brain-crunching, I finally found the flaw in my image-deduplicating code.
The code compares frame 1 of the animation with all the other frames, and only stored information about the frame if it differed from frame 1.
The fox' tail waving animation though, had pixels that were in both frame 1 and frame 2. This'd mark them as equivalent, so no need to store it in the base layer. Those pixels weren't there in frame 3 however, making it a non-static pixel, and excluding it from the base layer. After fixing this, the diff-based RLE format worked. One flaw however, it was incredibly slow. Debugging this lead to two issues:
- I was decoding the RLE first, storing the result in a string, and then parsing that string to actually draw the image
- The RLE decoding kept track of numbers by concatinating a string, which is slow
The RLE string looks something like this: "70b5a3b" (but way longer)
the decoding function then goes through the string, character by character. If it's a number, it needs to update it's current counter, if it sees a letter, it will expand it to current count times that letter.
The RLE implementation I found online keeps the count as a string like this:
count = ''
if current is a number:
count += current number (concatinate as a string)
then in the expanding step, it parses that as an integer, and multiplies the character accordingly.
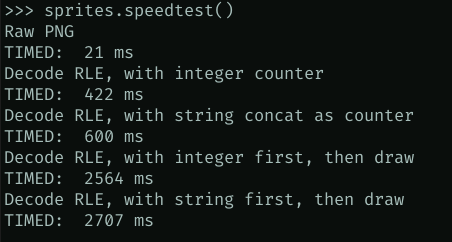
I did a bit more efficient implementation with math, because strings are expensive.
if current is a number:
count = count*10 + current number
as seen from the speedtest, this is quite a bit faster:
The hatching animation had 3 frames that took way longer to decode, because they differ a lot from the base image, and pixels laid out in a way that makes the RLE encode very inefficient.
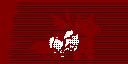
This shows the base layer in white, and the three very slow frames in semi-transparent red.
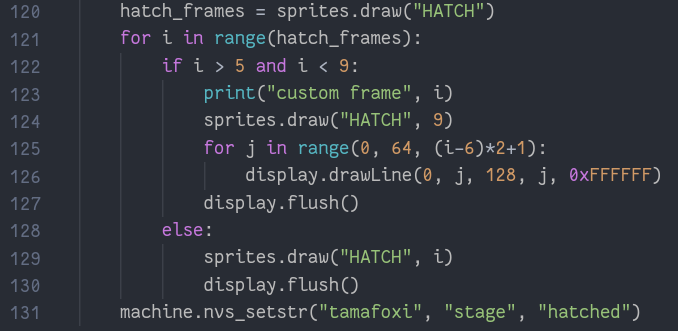
I thought about different ways of caching or otherwise making the loading time less visible, but then got a suggestion of just drawing the line animation from MicroPython, instead of decoding those frames.
With this bypass, everything ran nice and smooth, similar to the lifecycle v2 powered by PNGs
2 animation frames for feeding, giving the fox a fish in it's mouth, were added
Sleep mode was finalized, with the animation frames, some zZz's, and keeping the last-updated-hunger timestamp up to date in the NVS, without actually consuming hunger.
There's still some electronic quirks, with the i2c bus losing connection, or the battery not connecting properly and thus resulting on brownout at the ESP32. Some conversations were had about the pcb design, but nothing concrete yet.
In the next few weeks, I'll be cleaning up the sloppy code, and publishing the code nicely under GPLv3. Once the pcb design is done, it will be published as open/(libre?) hardware. We (tilde.industries) will then be selling it online.
The sprites won't be available publicly yet, but Neko twitter telegram is available for commission
Fun fact, I sort of repeated history with my 1bit RLE encoded animation optimization, from wikipedia:
"CompuServe introduced GIF on June 15, 1987 to provide a color image format for their file downloading areas, replacing their earlier run-length encoding (RLE) format, which was black and white only. GIF became popular because it used LZW data compression, which was more efficient than the run-length encoding"
Comments
October 20, 2019 16:05
@f0x Nice !
It seems you did much of the code by hand, because of the space constraint. Would of it been easier to use a sd card? Or even possible?
Also, could you talk about the price it costs to make all of this? Prototyping and such?